Get in Touch with Zhouxiang

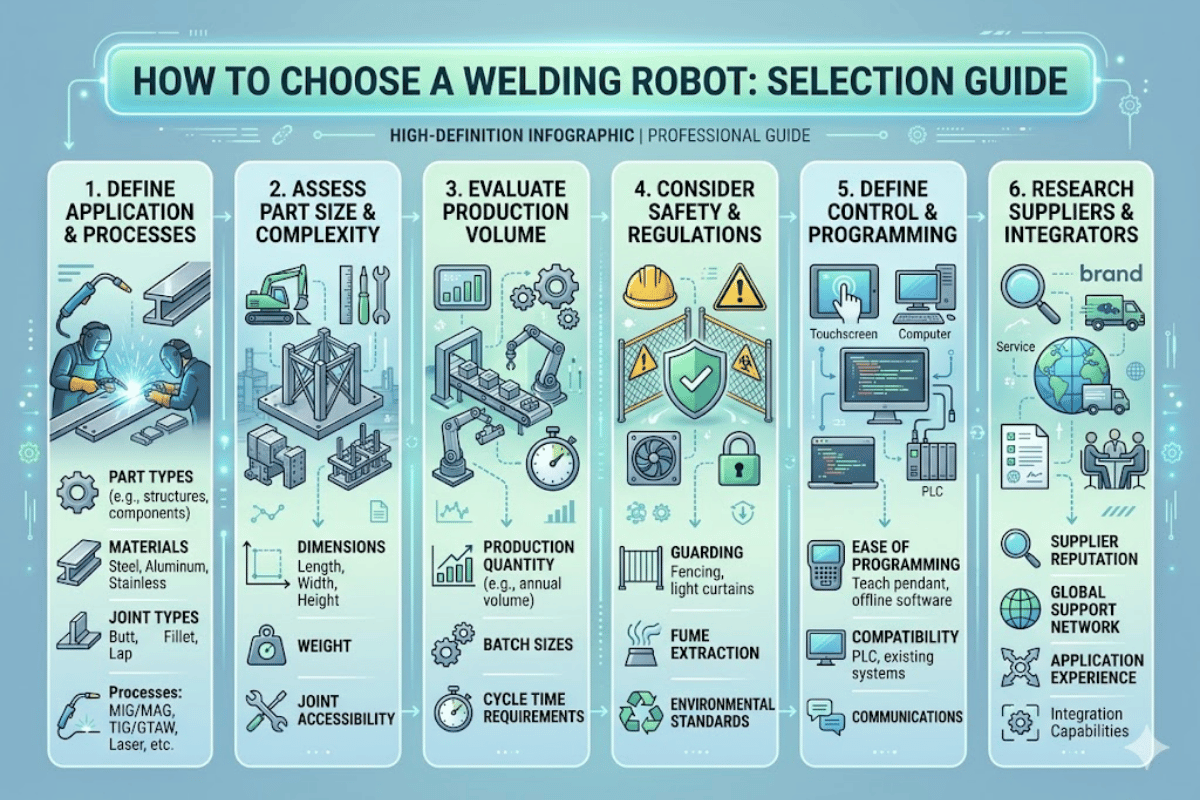
Choosing the Right Robotic Welding System for Your Production Line
Selecting a welding robot is nothing like requesting a shop floor machinery item from a catalog page. Selecting the wrong model puts your plant into decades of mediocrity – or at best, a costly piece of equipment forever idling because it was incapable of supporting your true joint geometry. With worldwide robot roll-out levels reaching 542,000 units in 2024 (per the IFR 2025 World Robotics Report), every year more producers are deciding more robots – and getting them wrong first time around.
These pages take you step-by-step through the dozens of decisions that turn a welding robot into an 18 month payback or a six-figure headache. Selection of weld process, robot-vs-cobot trade-offs, hardcost numbers and first-purchase pitfalls.
Why Manufacturers Are Turning to Robotic Welding
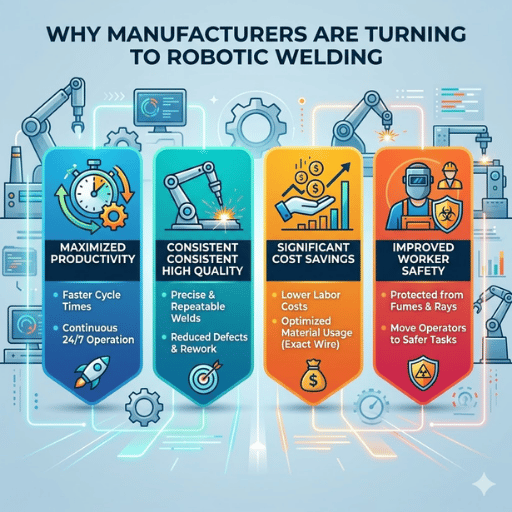
Hype has little to do with this transition to robotic welding. It is the numbers. Expert welders are leaving the business at a faster rate than apprentices are entering and the gap only grows larger.
The American Welding Society (AWS) estimates that there will be a deficit of 400,000 welding personnel in the year 2025. The current average of the welder in the US is 55 and about 30 percent of the remaining labor force will approach retirement age by the year 2025. For every five trained personnel there are two coming in.
400,000
Projected Welder Shortage (AWS)
542,000
Robots Installed Globally in 2024
55 yrs
Average U.S. Welder Age
As well as this, demand for welded assemblies in the construction, energy, and heavy equipment market areas has remained strong. U.S. Bureau of Labor Statistics projects a need to fill 82,500 new welding jobs annually through 2028 to sustain current levels of production.
Aside from labor, safety is also affected. OSHA notes that the process in welding results in the workers being exposed to metallic fumes, UV radiation, heat burns, and electrical shocks. IARC has classified welding fumes as a carcinogen in Group 1 while the cycles in the process are moved to a robot function, human operators are no longer exposed to the worst of the fumes.
In over 30 years of designing welding automation systems we have observed these same pressures drive fabricators of all sizes—from 10-person structural steel shops to sprawling shipyards—toward their first robot purchase. That economics now makes automation the right choice—even in mid-volume production environments—is proof that it was the right choice all along.
💡 Key Takeaway
Labor shortage and safety issues are roof issues. They will not come back. robotic welding is not about to make a dent in the unemployment; however, it is about to find jobs for which zero applications are received.
Types of Robotic Welding Processes Explained
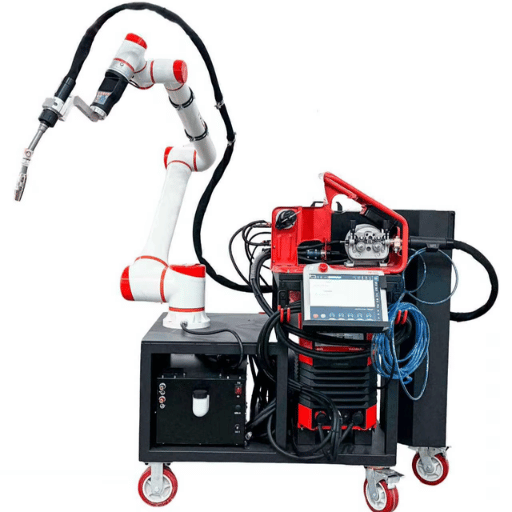
Before you can even assess any robot brand or cell configuration, the initial step is selecting which weld process appropriately suits your components. Since each process processes varied materials, thicknesses and joint types, not all robots are compatible with each process out of the box.
| Process | Best For | Material Thickness | Speed | Relative Cost |
|---|---|---|---|---|
| MIG / GMAW | Carbon steel, stainless, aluminum fabrication | 1–25 mm | High | $$ |
| TIG / GTAW | Aerospace, medical, stainless steel, thin materials | 0.5–6 mm | Low | $$$ |
| Laser Welding | High-precision, electronics, automotive, EV batteries | 0.1–12 mm | Very High | $$$$ |
| Spot Welding | Sheet metal assembly, automotive body panels | 0.5–3 mm (per sheet) | Very High | $$ |
| Plasma Welding | Heavy plate, demanding welding on thick sections | 0.5–20+ mm | Medium-High | $$$ |
MIG welding (Gas Metal arc welding) should be your workhorse of robotic welding applications. It handles a wide variety of welding tasks from structural steel fillet welds to aluminum fabrication, has high deposition rate and uses standard consumables. For most first time automation shops, a MIG-based ground-rail welding robot station is the fastest way to realize productivity improvements.
TIG welding results in the best bead appearance and handles thin materials well, but the robotic welding process is far slower compared to MIG. laser welding produces five times to ten times faster deposition rate than TIG on thin to medium gauge stock, but at much higher cost of welding equipment.
Our selection methodology starts from the joint type and the material type to be welded. If you are assembling 6 mm carbon steel H-beams or thicker, MIG arc welding robots would outperform all others on a cost-per-meter basis. If, on the other hand, you want zero-spatter aesthetic welds for stainless enclosures, TIG may be worth the slower cycle time.
💡 Key Takeaway
Match the weld process to the joint – not to the robot. The optimal process for your welding application determines which robot arm, power source, and welding torch you should use, not vice versa.
Key Factors When Selecting a Robotic Welding System

Once you figure out the weld process you need, the next decision is selecting the right robotic welding system for your facility. Not every cell configuration, robot reach, or controller platform has the same effectiveness in every production setting. These are the most important considerations:
- ✔
Workpiece size and reach envelope — Measure your largest part diagonal. The robot arm must reach every weld joint without repositioning. Ground-rail systems extend reach for welding large structural assemblies. - ✔
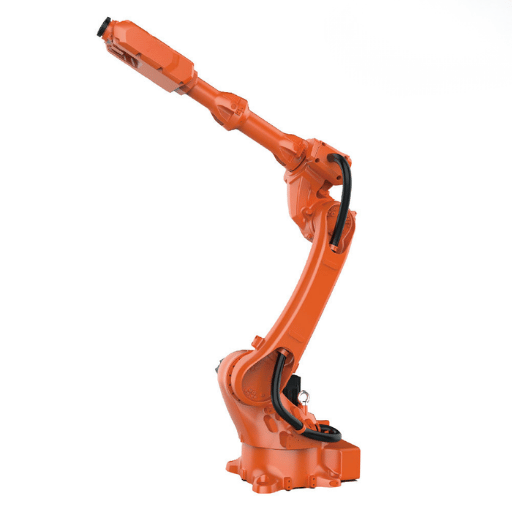
Payload capacity — The welding torch, wire feeder, and any sensors add up. A 6-axis robot arm with a 12 kg payload covers most arc welding setups. Spot welding guns often require 80–200 kg payload robots. - ✔
Welding position requirements — Flat-position welds are simplest. If your parts need vertical, overhead, or multi-position welds, ensure that the robot can maintain proper welding parameters across all positions. - ✔
Seam tracking capability — Part fit-up varies in real production environments. Laser-based seam tracking or through-arc seam tracking (TAST) corrects the torch path in real time, preventing missed joints and rework on complex welding geometries. - ✔
Programming method — Traditional teach-pendant programming works but is slow for high-mix shops. Offline programming and teachless systems that import 3D CAD models (from Tekla, SolidWorks, or similar) cut setup time from hours to minutes. - ✔
Duty cycle and throughput targets — Define how many parts per shift you need. This determines whether a single-station cell, a dual-station cell, or a multi-robot line is the right layout. - ✔
Integration support and training — A welding robot is only as good as the team running it. Evaluate whether the supplier provides on-site installation, operator training, and ongoing technical support for your robotic welding systems for structural steel applications.
⚠️ Most Common Selection Mistake
Deciding on a welding robot solely on itsprice tag without analyzing its reach envelope against your part geometry. If a robot cannot reach every joint, you will be forced to costly touch-up and will never realize the productivity improvements.
Our evaluation guide at Zhouxiang considers seven factors: reach, payload, repeatability (our systems hold 0.05 mm), weld process compatibility, programming technique, safety information, and ongoing post-sales integration support. Covering all these factors first wards off the costliest mistakes – especially in shops that rush to compare sticker prices.
💡 Key Takeaway
Assess welding needs before robot decision. A thorough weld audit – tracking every joint type, material thickness, and fixture requirement – accounts for 80% of first-project failures.
Industrial Welding Robots vs. Cobots: Which Fits Your Operation
Not every robotic welding cell needs an industrial floor-hosed robot behind protective fencing. Hybrid welding robots – cobots – have demonstrated a lot of value in shops who prioritize flexibility over maximum throughput, and knowing the places where each category thrives saves you from either overbuilding or falling short.
| Factor | Industrial Robot | Welding Cobot |
|---|---|---|
| Typical System Cost | $80,000–$250,000+ | $30,000–$150,000 |
| Payload | 6–200+ kg | 3–16 kg |
| Speed | High (fast repositioning) | Moderate (speed-limited for safety) |
| Programming | Teach pendant / offline software | Hand-guiding / simplified interface |
| Safety | Requires safety fencing / light curtains | Force-limiting; works near operators |
| Batch Size | High-volume, repetitive welding runs | Small to medium batches, high mix |
| Footprint | Large (dedicated robotic welding cell) | Compact; relocatable between stations |
We have deployed both configurations in various welding environments. When a shop produces 500 or more identical assemblies per week, industrial welding robots have been shown to outperform, with speed advantages that grow on high-volume shifts. A 6-axis robotic arm mounted on a ground rail can weld a 6-meter H-beam assembly in a fraction of the time it takes a cobot welding station to do the same thing.
Cobot welding wins in environments where job variety is high and batch sizes are below 50. Put a welding cobot on a different table, have it reprogrammed by a welder who has never coded a line, and have it up and running in an hour. That’s a major advantage in contract fabrication businesses running somewhere between a dozen and a hundred different part numbers a week.
One detail a lot of purchasers forget to consider: the cobot system is merely a third of the entire expense. Include fixtures, the welding power source, fume extraction, and setup labor, then a cobot welding installation priced at $50,000 for the robotic arm alone becomes $150,000 installed. Budget for the full quantity.
💡 Key Takeaway
Industrial robots beat cobots on throughput. Cobots beat industrial robots on changeover speed. Pick the one that corresponds to your actual production mix – rather than the one that looks best in a brochure.
Welding Robot Cost and Return on Investment
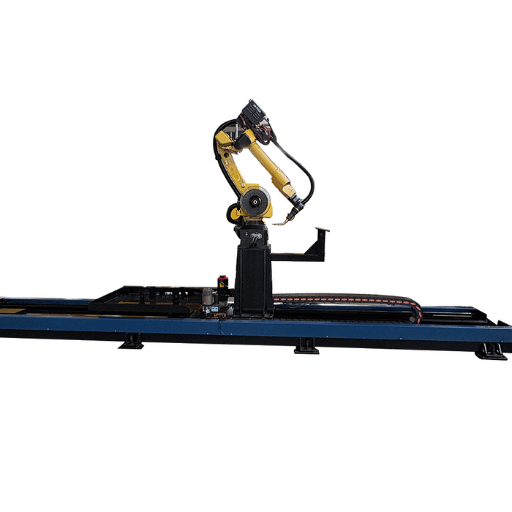
A welding robot is a capital investment—and the purchase price is only one consideration. When you know the total cost breakdown, you can prepare a thorough budget and estimate the time it takes for the system to begin saving you money.
Typical Cost Components
- Robot arm + controller: $25,000-$80,000 (6-axis, 6-12 kg payload for arc welding)
- Welding power source + wire feeder: $8,000–$25,000
- Welding torch + consumables package: $3,000–$8,000
- Safety enclosure or fencing: $5,000–$15,000
- Positioner / ground rail / fixtures: $10,000–$50,000
- Integration, programming, and installation: $15,000–$40,000
- Operator training: $3,000–$8,000
Total system cost of a production ready robotic welding cell is roughly $80,000—$250,000, depending on the weld process, size of the workpiece, and automation. A simple, MIG cobot cell starts nearer to the $80,000 end. Multi-station industrial cell with positioners and offline programming reaches the $250,000, end.
Calculating return on investment comes down to labor reduction throughput improvements and rework reductions. From our delivered projects we have found that a complete welding robot production line in place of two manual welders on single shift would typically realize payback within 12 to 24 months. On two shifts that timeline approaches twelve months.
12–24 mo
Typical Payback Period
3–5×
Throughput vs. Manual Welding
Up to 90%
Reduction in Weld Defects
Here’s a real example: a job shop with two manual welders, each costing $28/hr loaded (w/benefits + overhead), uses nearly $116,000/yr of welding labor for one shift. A welding robot cell installed at $150,000, operated by a single technician yields three to five times the output while decreasing defects. The numbers always favor the investment for jobs performing repetitive welding on common parts.
💡 Key Takeaway
For an accurate assessment, don’t consider welding robot Cost stand alone. Add in the full installed system cost and divide it by your annual labor savings. For many shops that crunch their numbers, payback comes in less than 2 years.
Get a Custom Welding Robot Quote →
Common Mistakes When Buying a Welding Robot

First-time buyers make predictable errors. Recognizing these patterns before you commit saves months of frustration and tens of thousands of dollars in rework costs.
1. Starting with the most complex part
Your instinct is to automate your hardest weld first — the one that takes the most skill and causes the most rework. Resist it. Complex joint geometries, tight tolerances, and multi-position welds multiply programming time and fixture cost. Start with a simple, high-volume, repetitive welding job to prove the concept and build operator confidence. Expand scope after the team has experience.
2. Underestimating fixture costs
During the sales process the robot gets all the attention, but fixtures determine whether the system actually produces good parts. A robotic welding system requires parts to be loaded identically cycle after cycle. Manual loading with inconsistent fit-up yields welds with inconsistent profile and quality. Allocate 20-30% of total system investment for fixtures and positioners.
3. Choosing a system that requires a robotics PhD to program
Not all welding robots have the same learning curve. Some demand weeks of specialized training and proprietary programming languages. If your shop lacks a dedicated robot programmer, or cannot hire one, choose a robotic welding system with intuitive teach-pendant operation or CAD-based offline programming, and train your best welders to run the robot rather than hiring external robotics experts.
4. Ignoring the full cost of ownership
That sticker price of the machine is just the initial. The hidden costs include a perpetual supply of welding nozzles and liners, spare parts, annual maintenance contracts, unplanned production stops during scheduled maintenance. Consult your robot sales provider for a five-year total cost of ownership estimation before ordering.
5. Skipping the weld audit
Before executing any welding automation project, we instruct all our clients in the process of weld analysis, mapping every joint geometry, part material thickness and type, production volume, and fixture requirements. Customers who ignore this process often discover, during installation, that the robot will not reach certain geometry points or that the fixtures require reinvention. The process takes 1-2 weeks. Ignoring it can cost 6 months.
💡 Key Takeaway
Most failed welding robot projects are not caused by bad robots — they are caused by bad planning. A detailed weld study and a conservative fixture budget forestall the vast majority of first-project failures.
How to Plan Your Welding Automation Project Step by Step

Transitioning from “we need a welding robot” to a fully functional production cell is cyclical. Here is the process we follow with clients new to robotic welding.
Step 1: Feasibility Study and Weld Audit (2 weeks)
Document every weld joint by geometry type, material and thickness, current cycle time, and defect rate. Narrow down three to five pilot parts with highest volume and simplest geometry. Confirm projected labor savings and sufficient production volume to justify the investment.
Step 2: Robot Selection and Cell Design (3–4 weeks)
Choose robot arm, power input, peripheral welding equipment per weld audit results, draw robotic welding outline with workpiece positioners, safety, and fume systems. Confirm reach envelop covers all pilot joints. Request simulation from provider if available.
Step 3: Fixture Design and Fabrication (4–6 weeks)
Custom-built fixtures are not optional for automated welding. They guarantee the robot sees the same part geometry every cycle. For your first welding automation project, consider outsourcing fixture design to learn what works. Pilot trial and inspect fixture repeatability prior to robot program development.
Step 4: Installation, Programming, and Commissioning (2–4 weeks)
Install the robot cell, program weld paths, set welding parameters, and run trial welds. Inspect sample parts against specifications and adjust parameters until the weld profile meets requirements. Commission the cell for production.
Step 5: Operator Training and Production Ramp-Up (2 weeks)
Train welders and operators on daily startup, program selection, part loading, basic troubleshooting, and welding torch maintenance. Run the first two weeks at reduced speed to catch fixture or programming issues before full-speed production. Write standard operating procedures.
Total time line from decision to production: approximately 13 to 18 weeks typical for single-cell ground rail welding robot; multi-cell lines depend on scope.
💡 Key Takeaway
The right partner makes all the difference. Pick a source that will guide you every step of the way from weld audit to operator training—rather than one that ships a robot and sends an invoice.
Frequently Asked Questions
How to choose my first welding robot?
View Answer
Start with a weld audit to identify your highest volume, simplest parts. Choose a MIG-based robotic welding system with enough reach, invest in proper fixtures, and train your best welder to run the cell.
Are welding robots expensive?
View Answer
Cost of production-ready welding robot cell varies between $80,000 and $250,000 based on the weld process, workpiece dimension, and level of automation. Cobot welding stations are less expensive initially (~$30,000 to $70,000 for the robot arm alone), but priced three times higher ultimately including fixturing, power source, and integration. Most systems pay for themselves between 12 and 24 months through labor reduction and lower rework costs.
What type of company benefits from a robotic welding system?
View Answer
Anyone who runs repetitive welding on standardized parts. Structural steel fabricators, automotive suppliers, shipbuilders, heavy equipment manufacturers, and metal furniture producers are prime candidates. The best ROI is when your parts have regular geometry, moderate to high-volume runs, and you struggle to find or keep welders.
What welding processes can robots handle?
View Answer
Robots perform the following processes: MIG ( GMAW), TIG ( GTAW), laser welding, spot welding, plasma welding, and submerged arc welding. MIG is most common for robotic applications because of high deposition rate and forgiving fit-up tolerance. TIG robots are preferred for thin materials or purely cosmetics. Laser robots provide highest speed for precise assemblies.
Will welding be replaced by robots?
View Answer
Robots will not eliminate all welding. Custom welding, field welding, repair work, and other applications that require judgment are still done by people. What robots replace is the most repetitive, high-volume manual welding work; exactly those positions that are now hardest to fill during the current labor shortage. In automotive, structural steel, shipbuilding, and heavy equipment manufacturing, robotic welding already handles the bulk of production volume while skilled welders focus on programming, supervision, and troubleshooting. Demand for welders who can operate robotic welding cells is actually growing.
What are the most valuable features to look for in robotic welding equipment?
View Answer
Focus on seam tracking (laser or through-arc welding), intuitive programming platforms, consistent wire feed quality, controllable torch maintenance, and reliable cooling systems. For heavy structural steel, ground-rail travel and large work envelope matter more than maximum speed. Out-of-the-box support and trainers form the supplier matter equally—well-equipped welding does not do well without training and setup.
Ready to Find the Right Welding Robot for Your Shop?
Provide a profile of your parts, material, and production volume, and we will tell you what robotic welding system to choose, and team with you every step of the way from weld audit to volume production.
About This Analysis
This guide was put together by the engineering team at Zhouxiang, a welding automation manufacturer established in 1991 with over 200 patents and more than 1,000 robotic welding projects delivered across 50 countries. The cost data and timeline estimates come from real project quotes and delivery records from 2024 and 2025. We build welding robot systems, but our goal here is to help buyers — including those who choose a different supplier — make a well-informed decision.
References & Sources
- World Robotics 2025 Report — International Federation of Robotics (IFR)
- Welding Workforce Data — American Welding Society (AWS)
- Occupational Outlook Handbook: Welders, Cutters, Solderers, and Brazers — U.S. Bureau of Labor Statistics
- Welding, Cutting, and Brazing: Hazards and Solutions — Occupational Safety and Health Administration (OSHA)
- 7 Common Types of Robotic Welding Processes — Association for Advancing Automation (A3)
- Considerations for Your First Welding Robot — AWS Welding Digest, October 2025